Best Windows 10 settings to make life easier – Part 2
Working with unnecessary files
Turning from the features of the appearance of the system to more functional features, I want to mention immediately the added feature of Automatic disk cleaning. This is not the previous disk cleaning menu, where you had to go into the properties of each of them and, after waiting for a while, select which files and which partitions Windows can delete without harming you. This is an automatic process, which you once set up, will not run at all.
It consists in quite an ordinary action of cleaning unnecessary files, which, for example, stuck in the trash can or accumulated in folders with temporary files. But it is in this simplicity that the whole charm of this option lies – it does for us something that it did not do before and it is very important. Since today, more and more users are installing the system on SSD solid-state drives, and their cost is much higher than the usual HDD.
To activate this function, you need to go to the Settings => System => Storage menu and set the Memory Monitor to On. It is available to all owners of the version of Windows Creators Update and above.
Display hidden files or extensions
For convenient organization of work, for example, in the office, or simply in a large team where everyone is sitting next to you and can look into your computer, it can be convenient to hide working files and folders from prying eyes. The main advantage of this operation is that you do not need to transfer them somewhere to the far corners of disks, but just a couple of mouse clicks to make them hidden.
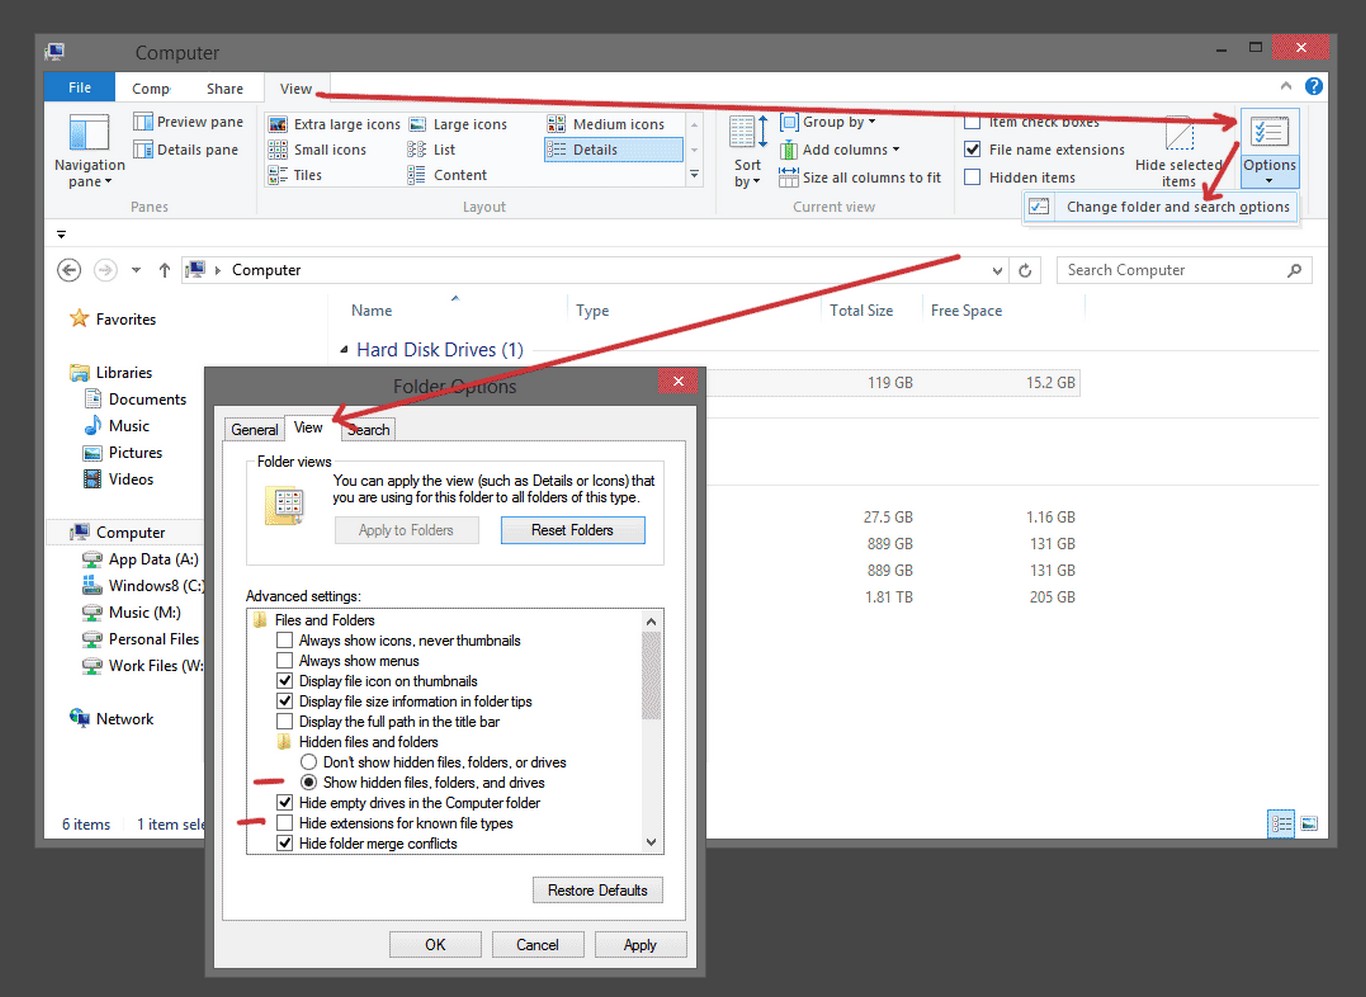
Clicking in the window of any folder on the View tab and on the right side of the panel by ticking the Hidden items option, in the Show or Hide section, you will make it possible to see all the hidden files and folders that are in this window. Thus, having a certain (or several) working folder, which you often open on the screen, but you would not want colleagues to come up to see some of its files, you can partially hide its contents. By right clicking on any file or folder and selecting the Hidden attribute in its Properties, you can later hide and show this and other such files with just one click.
This is not a secret function and many understand that there are hidden folders and files in Windows, so, of course, this is not a way to hide sensitive data or especially confidential information. It is most intended for the fact that no one sits down for your computer and it is only at your disposal. In fact, this operation is akin to turning over paper documents on your desk, when all those who see it can see only white sheets of paper and can not even grasp the edge of their eyes what is there. The main thing do not forget to turn off the display of hidden files at once, as it has ceased to be necessary.
As a bonus for fans of conspiracy, we can suggest using another, by default hidden, function of Windows – to display file extensions. Almost every file, after its name, follows its extension. It looks like .jpg (images), .docx (Word documents), .xlsx (Excel documents), .txt (notepad files) and so on. Initially, Windows does not display this information and shows only the name of the file. But after you tick the File Name Extensions (next to the checkmark for displaying hidden items), you can see such endings for each of your documents in the folder.
Using this approach, you can even more conveniently disguise certain files, changing their native extensions to others. For example, an important document Moyfile.docx is renamed to Moyfile.jpg, due to what in the system it will be displayed as an image (which, of course, can not be opened) and even clicking on it the outsider sees nothing. Such secret opportunities, combining with hidden files, you can think up quite a lot – the main thing is not to get too involved in this, because you can get too much distrust of everyone and everything. And this is the first step to sealing microphones and webcams of your laptops, and it all started with the fact that you wanted to hide a file from the accounting department with data about your salary or a folder with music.
And, of course, do not forget all those actions that you have done to then yourself not to be at an empty computer or with a bunch of non-opening files – all is well in moderation and try not to overdo it.
Backup and Restore
Although free space on modern storage media is still expensive, we strongly recommend that you pay attention to this point. As with mobile devices, the operation of the operating system may fail. And although one advantage of the PC is – it’s hard to lose, the probability of failure at the level of the OS itself still remain. This can be caused by various factors – incompatibility of drivers, incorrectly completed work of system updates and many, many other reasons.
So that any of these causes is not pain, which will not only deprive you of many settings, but also of precious time spent, always reserve on the disk a place for system recovery. This is called a recovery service and it is recommended to enable it from the first days of using the PC or laptop. The main principle of its work is to create a backup of all important system files and settings that are responsible for the correct operation of the entire Windows. That’s right, if necessary, you can restore the normal operation of the system, in case of force majeure.
To do this, go to the Settings => System => Restore menu or type the word Recovery in Search. In the second option, you will be presented with the available options for the recovery system settings. Click on this item and you will be taken to the section where you can select the drive where you have the Windows system installed. Usually this is Drive C and you can immediately check whether System Restore is turned on or off. If disabled, click the Configure button and enable this option by selecting the percentage of disk capacity that will be used for recovery files. It is usually recommended to allocate up to 10% of the capacity of the C drive itself.
Now, in case of any failures and malfunction of the system after any actions or new programs, you can always go back one step, by the time you install these updates, and restore a stable version of Windows.
Windows Defender
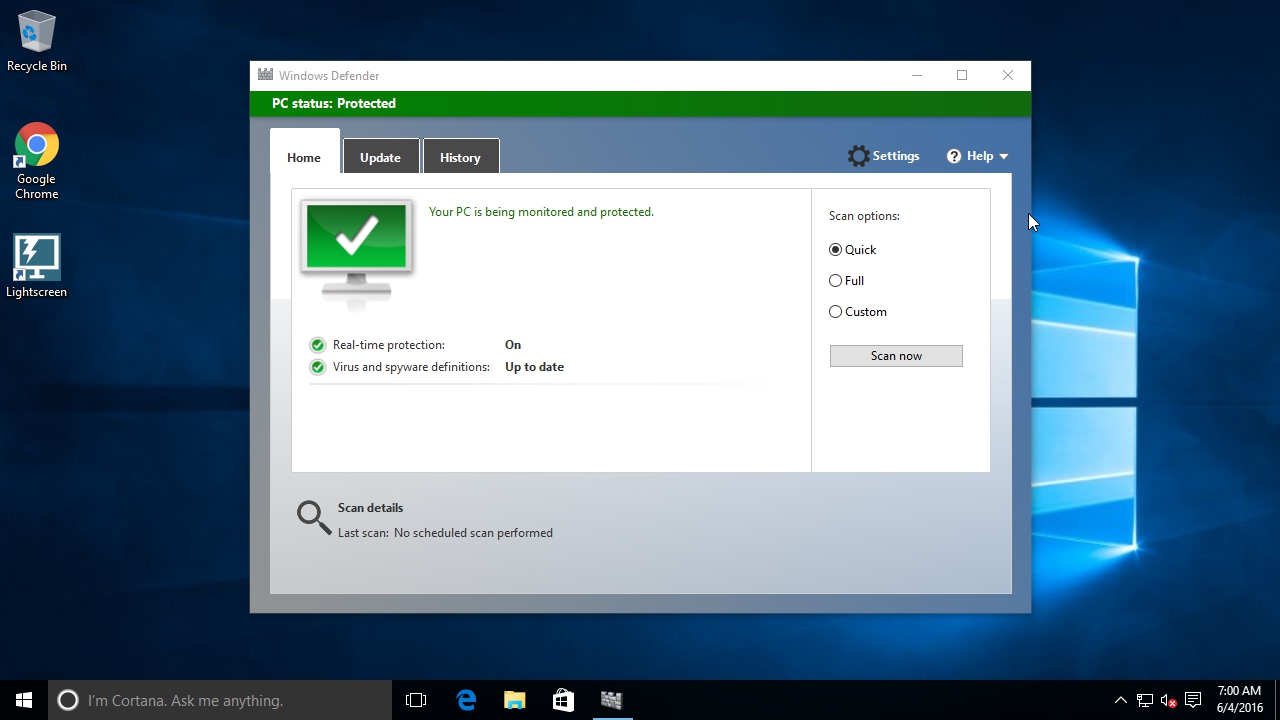
Well, the final opportunity, which we would like to tell, in Windows 10 is the built-in antivirus, called Windows Defender. It is fast, almost invisible and of high quality – thanks to this software product, which is part of the operating system itself and regularly updated, you can forget about various third-party antiviruses that you often have to install, reinstall, update or worse buy.
In our view, Windows Defender has implemented quite well the mechanism of protection against malicious software, many of the main threats that can occur with regular Internet access and protection at the execution level of malicious attachments and files. You should completely have enough of its capabilities, and the main thing is that it practically does not slow down the system, as it happens with antiviruses – you will almost never notice its presence (unless, of course, you constantly try to open files containing viruses or install questionable software).
You can configure the Defender in the Settings => Update and Security => Windows Defender.
We have listed for you the most interesting features and settings of the newest and most popular operating system in the world – Windows 10. If you have not used one of them yet, we hope that after reading this article you will be able to fully appreciate all that thoughtfulness and the comfort that the new OS is ready to offer you.